

- This tutorial is for Inkcape (free vector program www.inkscape.org)
- This is advanced level tutorial: you need to know what is Inkscape, how to create and manipulate objects, paths, fill and stroke.
- Tested in version 0.92
2020.05.01 Important update.
Inkscape version 1.0 has been released. This version has received major updates to program. One of the new features added is new Live Path Effects dialog and new effects, one of these is the great “Offset” effect.
Below you will find an updated instruction for versions up from 1.0 and older instruction for versions below 1.0.
Sharp offset for Inkscape 1.0 and above
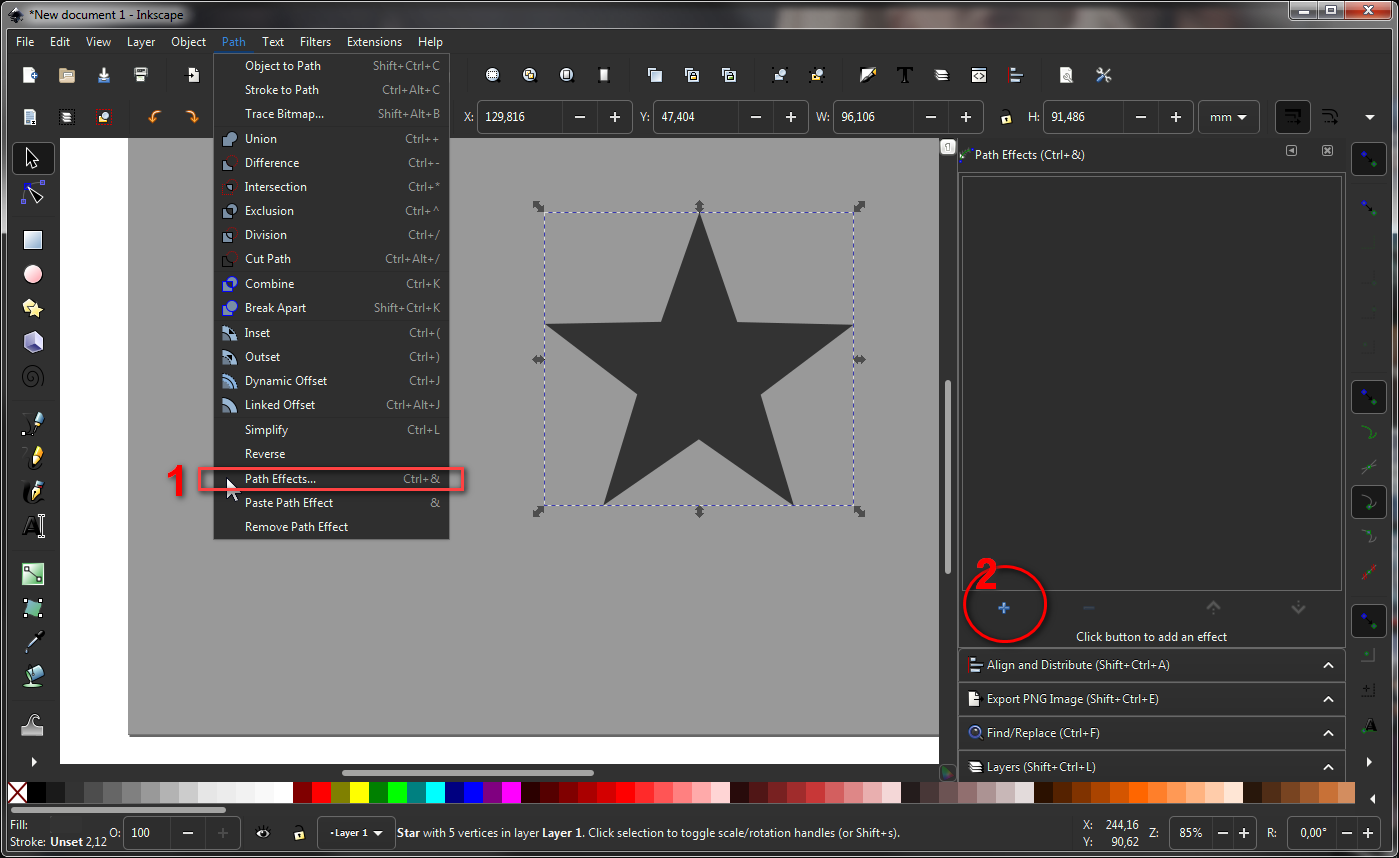
Inkscape Path Effects
Select desired path to change
- Go menu “Path -> Path Effects…” or press Ctrl+&
- Click [+] button in “Path effects” panel

3. “Live Path Effects” dialog opens..
4. Select “Offset” effect

5. Select “Miter” from “Join:” select box. By the way you can experiment with other join types, for various offsets as bevel, and rounded.
6. Adjust “Offset:” and “Miter limit:” values to your needs.
7. If you need to make effect permanent, go Menu “Path -> Object to Path” or press Shift+Ctrl+C
Sharp offset for Inkscape below versions 1.0
Problem: there are some offset tools in inkscape (http://tavmjong.free.fr/INKSCAPE/MANUAL/html/Paths-Editing.html#Paths-Offsets). But they produce some kind of rounded and deformed paths in result. For example:


If you need sharp and exacts offset like in other drawing or CAD programs, you can achieve this in Inkscape also, but this needs more steps.
Solution: I found some workaround to this “feature” to achieve exact path offset is through duplicating the object, then playing with its stroke parameters, and later converting stroke to path.
Step 1. Make a duplicate of your original object (that is already a path object).

Step 2. Make a stroke of desired width, and remove fill of object. You can again make another duplicate of the same path and adjust its transparency, then set stroke of another for a better view of stroke width. Also set stroke style to “Miter join” and adjust values.


Step 3. Convert stroke to a path object.


Step 4. Make a another copy of original path. If you want a bigger offset of original, then align stroke object and one of the originals as you want, then path union both objects. If you want a smaller offset of original, then align stroke object and one of the originals as you want, then make a path difference.


About the Author: markoze


Products, addons and solutions I recommend
- Disclosure info: images and links here maybe affiliate links and promotions.


Recent posts


Posts categories
Recent artworks


Printed artworks and merchandise

Recommended

- Recommended products and links may be affiliated links